Drone Photography Tips for Beginners
Drone photography has become more accessible in recent years, with technology making it easier for anyone to capture stunning aerial views. If you're new to this, you might feel a bit overwhelmed by the choices of equipment and the rules you need to follow, especially here in the UK where regulations are straightforward but important to get right. This guide walks you through the basics step by step, from picking your first drone to editing your shots, all while keeping things practical and safe. We'll cover what you need to know without assuming you've done this before, and we'll mix in some real-world advice to help you avoid common pitfalls.
Table of Contents
Choosing Your First Drone
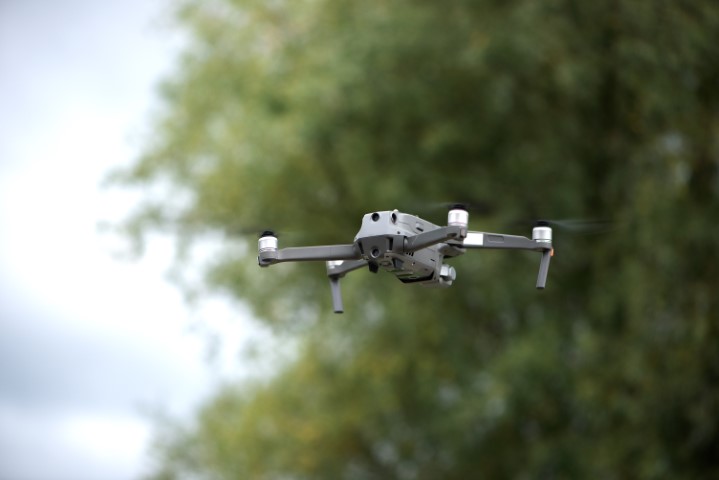
Getting the right drone as a beginner sets you up for success. It helps you learn flying basics without too much frustration, while still capturing decent photos from the air. In 2026, the market has plenty of options, but new pilots do best with models that are easy to control, reliable in typical UK conditions, and equipped with a solid camera for photography.
The key is balancing cost, ease of use, and features like stability and safety tools. Many beginners start with lighter drones under 250g – these often mean fewer registration hassles under UK rules, letting you focus on flying rather than paperwork.
Why Weight Matters for Beginners
Drones under 250g are popular starters because they fall into a lower-risk category. You can fly them closer to people (with care) and in more places without extra permissions. They are also portable, folding up small enough to fit in a bag. On the downside, very light ones can struggle more in wind, so look for ones with good GPS hold.
Budget Options Under £500
These give you proper aerial photography without spending a fortune. Expect 4K video capability (great for stills too) and basic stabilisation.
-
DJI Mini 4K: This remains a top pick for newcomers. It weighs under 249g, shoots sharp 4K footage, and has simple app controls that make takeoff and landing straightforward. The battery lasts around 30 minutes, and features like quick shots help you get creative photos right away without advanced piloting skills.
-
DJI Neo 2: A super-compact option that's palm-launchable – no controller needed for basic flights. It's ideal if you want hassle-free selfies or quick landscape shots. The camera delivers stabilised video, and it's tough enough to handle minor bumps as you learn.
-
Potensic Atom 2: A strong non-DJI alternative with 4K recording and GPS stability. It includes useful beginner modes like return-to-home, and the app is intuitive. Many users praise its value for reliable performance in everyday UK weather.
Mid-Range Choices (£800–£1,200)
If you're sure you'll stick with drone photography, stepping up here gets you better image quality and smarter features. These often include obstacle sensors to avoid crashes.
Here are some standout models in this range:
-
DJI Air 3S: Excellent for photography with its upgraded sensor for clearer, low-light shots. Dual cameras offer wide and telephoto views, perfect for varied compositions like landscapes or details. Flight time hits 45 minutes, and omnidirectional obstacle avoidance makes it forgiving for learners.
-
DJI Mini 5 Pro: Still under 250g but packed with pro-level tools, including better sensors and tracking. It's a great bridge if you want high-quality RAW photos without the weight penalties of larger drones.
Essential Features to Look For
No matter the price, prioritise these to make your early flights smoother and your photos sharper:
-
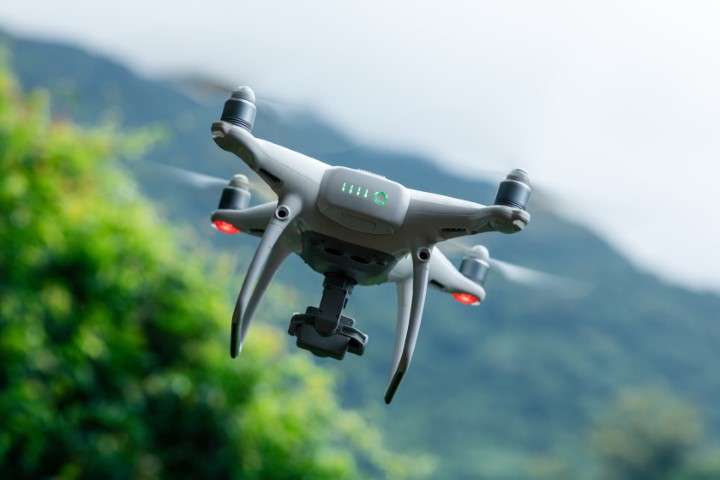
GPS and Return-to-Home: GPS locks the drone in place, even in breeze – crucial for steady shots. Return-to-home brings it back automatically if signal drops or battery runs low, reducing loss risk.
-
Gimbal Stabilisation: This is the motorised mount that keeps the camera level. Without it, photos come out blurry from any movement. A 3-axis gimbal is standard on good models and makes a huge difference for clear images.
-
Obstacle Avoidance: Sensors that detect objects and stop or reroute the drone. Basic forward-sensing is helpful for beginners; full surround is nicer on mid-range picks.
-
Battery Life and Extras: Aim for at least 25–30 minutes per battery. Buy a fly-more kit with spares – you'll want them.
Once you've shortlisted a couple, check recent reviews on sites like Amazon or UK drone forums. Real-user experiences in British wind and rain will tell you how they hold up. Start simple, practice in open spaces, and you'll soon be taking photos you're proud of.
Understanding UK Drone Regulations
Getting familiar with the rules before you fly is essential. The Civil Aviation Authority (CAA) sets these regulations to keep the skies safe for everyone, from people on the ground to pilots in full-sized aircraft. As of 2026, some updates have come into effect to handle the growing number of drones, but the core principles focus on responsibility and common sense.
Most beginner photography drones fall into the Open Category, which covers low-risk recreational flying. These rules apply whether you're flying for fun or just practising aerial shots.
Registration and IDs You Need
From 1 January 2026, the requirements have tightened to promote safer flying:
-
Flyer ID: Anyone flying a drone or model aircraft weighing 100g or more outdoors must pass a free online theory test to get this. It covers basic safety knowledge and is valid for five years. The test takes around 30–40 minutes with 40 multiple-choice questions, and you can retake it if needed. Even for drones under 100g, the CAA recommends getting one—it's good practice.
-
Operator ID: If you're responsible for the drone (usually the owner), register for this if the drone has a camera and weighs 100g or more, or if it's 250g or heavier regardless of camera. It costs £10 annually and must be displayed clearly on the drone. This acts like a registration plate, showing who is accountable.
Once you've got your Operator ID and Flyer ID sorted, it's a good idea to carry some form of identification while flying. Our Drone Pilot ID Cards clearly display your Operator ID and Flyer ID details, making it easy to show them if needed. We recommend checking our range if you're looking for a durable, wallet-sized option
For families, children under 13 need a parent or guardian present to take the Flyer ID test, and under-12s must be supervised by someone over 16 when flying. Sort these out on the CAA website early—it only takes a short time and avoids any hold-ups.
Key Flying Limits
These haven't changed much, but always double-check via apps as conditions can vary.
-
You must always fly within visual line of sight—keep the drone where you can see it unaided (binoculars are okay for scanning, not controlling). Maximum height is 120 metres (400 feet) from the ground surface, and many drone apps let you set this limit automatically.
-
Maintain at least 50 metres horizontal distance from people, vehicles, buildings, or structures not under your control. This creates a buffer zone for safety. For lighter drones (under 250g or certain class marks), you can fly closer or even over people in some cases, but never endanger anyone.
-
Stay at least 150 metres away from crowds (1,000+ people), residential, recreational, commercial, or industrial areas when using higher-risk operations. Plan flights in open spaces like parks or countryside.
No-Fly Zones and Planning Tools
Restricted airspace is a big one—ignore it and you risk serious fines.
-
Airports, airfields, prisons, military sites, and nuclear facilities have Flight Restriction Zones (FRZs). You cannot fly inside these without permission from air traffic control or the site operator. Temporary restrictions pop up for events too.
-
Use free tools to check before every flight:
-
The CAA's Drone Safety app or website maps
-
NATS Drone Assist app—shows airspace and lets you plot routes
-
Apps like UAV Forecast for weather and wind checks
In busy areas like near cities, always verify—UK weather can change quickly, affecting visibility.
Privacy and Ethical Considerations
Drones with cameras bring extra responsibilities under UK data protection laws (GDPR and Data Protection Act).
-
Respect privacy: Avoid flying over private gardens, homes, or places where people expect seclusion without permission. Even in public, don't capture identifiable images of individuals if it could intrude—blur faces in photos shared online if needed.
-
If sharing aerial photos: For hobby use, it's usually fine for landscapes, but if people are recognisable and the context is private, get consent where possible. Commercial photographers should be extra cautious and consider insurance that covers privacy claims.
-
Good habits: Fly responsibly, announce your presence if near others, and focus on ethical shots. This not only keeps you legal but helps the whole drone community.
Breaking rules can lead to fines up to £2,500, drone confiscation, or worse for serious cases. Start with the CAA's Drone Code—it's straightforward and covers everything here in more detail. Once registered and informed, you'll fly with confidence and capture great photos safely.
Preparing for Your First Flight
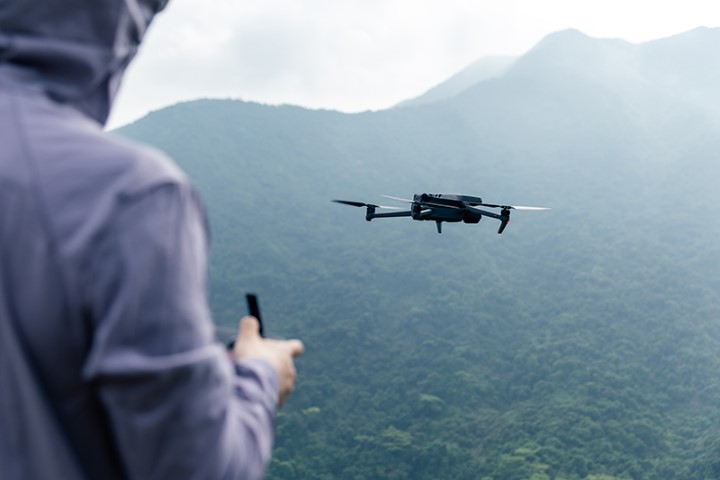
Your first flight is exciting, but a bit of preparation goes a long way to making it smooth and safe. In the UK, weather can shift quickly, so planning ahead helps avoid issues like sudden wind or rain. Start by choosing a wide-open space, such as a quiet field or large park, well away from people, roads, airports, and restricted areas. This gives you room to manoeuvre without worry.
Choosing the Right Location
Finding a good spot is one of the most important steps for beginners.
-
Check airspace restrictions every time using apps like NATS Drone Assist or the CAA's tools. These show no-fly zones, temporary restrictions, and hazards like airfields. Even if your drone's built-in geofencing warns you, always verify independently—apps might not have the latest info.
-
Pick areas with plenty of clear space, ideally at least 50 metres from any people, buildings, or vehicles you don't control. Avoid crowded parks on busy days; opt for rural fields or designated model flying sites if possible.
-
Consider the ground: Flat, open grass is ideal for takeoff and landing. Steer clear of tall crops, water, or uneven terrain that could cause problems if you need to land quickly.
Weather Checks and UK Conditions
UK weather is unpredictable, and conditions like wind or cold can affect how your drone handles.
-
Strong winds are common here, especially in open areas—most beginner drones struggle above 20–25 mph. Rain or drizzle can damage electronics, so postpone if it's wet. Cold temperatures reduce battery performance significantly, shortening flight times.
-
Use apps like UAV Forecast or Windy to check wind speeds at ground and altitude levels, gusts, precipitation chances, and visibility. Aim for calm days with winds under 15 mph for your first flights. Monitor during the session too, as conditions can change fast.
Essential Pre-Flight Setup
Before powering on, run through some basic checks to catch any issues early. Most modern drones, like DJI models, need updates and calibrations for safe operation.
-
Update firmware via the app—manufacturers release fixes for stability and safety. Do this at home with good Wi-Fi.
-
Calibrate the compass and IMU (inertial measurement unit) if prompted, or routinely for first flights. Do compass calibration outdoors, away from metal objects, cars, or concrete with rebar—spin the drone as instructed for accurate heading.
-
Insert a formatted SD card if you're planning photos, and remove the gimbal clamp if your drone has one.
Battery Management in UK Weather
Batteries are often the weakest link, especially in cooler British conditions.
-
Cold weather slows chemical reactions in LiPo batteries, cutting flight time by 20–50% and risking sudden power drops.
-
Charge batteries fully the night before, and keep them warm until insertion—store in an inside pocket or insulated bag. Avoid charging or using cold batteries; let them warm to room temperature first.
-
Carry spares in a fly-more kit, and plan shorter flights initially (aim for 15–20 minutes even if rated higher). Hover briefly after takeoff to warm the battery if needed.
-
Monitor voltage closely in the app—land with at least 20–30% remaining for safety margin.
App and Controls Familiarisation
The app is your main interface, showing live view, telemetry, and controls.
-
Connect your phone or tablet securely, and practise in beginner mode if available—this limits height, distance, and speed.
-
Familiarise yourself with return-to-home (RTH) setup: Ensure it activates on low battery or lost signal. Test in open space.
-
Practise gentle stick movements: Slow inputs for hover, ascent/descent, and yaw (rotation). Avoid aggressive pushes early on.
Final Safety Checks
A quick routine before takeoff builds good habits.
-
Inspect the drone visually: Check propellers for damage or cracks—replace if nicked. Ensure arms unfold properly, sensors are clean, and everything feels secure.
-
Have a spotter if possible to watch for people or aircraft while you focus on controls.
-
Run the app's pre-flight checklist if offered—it covers home point, GPS lock, and more.
With these steps, your first flight should feel controlled and enjoyable. Start low and slow, hover to get confident, then try simple movements. Practice regularly in safe spots, and you'll quickly build skills for better photography.
Basic Flying Techniques for Photography
Once your drone is in the air, the focus shifts to flying smoothly while capturing great photos. As a beginner, keep things simple at first—practise in calm conditions and use the drone's stability features to help. Most modern drones, like those from DJI, have modes such as Tripod or Cine that slow everything down, making it easier to hold steady and frame shots without jerky movements.
Smooth control comes from gentle inputs on the sticks. Quick or aggressive pushes cause wobbles that blur photos, especially without perfect stabilisation. Start by hovering in one spot to get used to small corrections.
Starting with Hovering
Hovering is the foundation for sharp aerial photos, as it lets you compose without the drone drifting.
-
Hold a steady hover at around 5–10 metres up in an open area. Use the app's GPS hold to keep position, then adjust the gimbal (the camera tilt wheel) to frame your subject. This gives time to tweak composition, like applying the rule of thirds—place key elements off-centre for more interesting shots.
-
If wind nudges the drone, make tiny stick corrections rather than big ones. Overcorrecting creates swing that takes time to settle. Many drones show wind speed in the app; if it's pushing hard, bring it down and wait for calmer air.
-
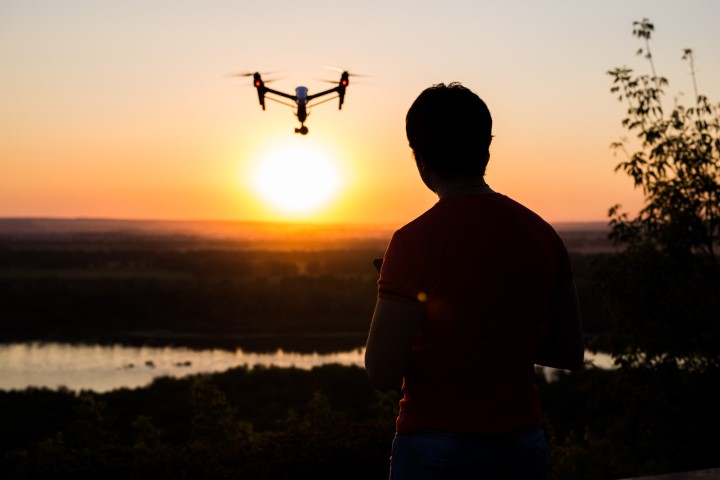
Take multiple shots while hovering, including bursts or bracketed exposures (AEB on DJI models). This captures variations in light, useful for tricky scenes like sunsets over UK landscapes.
Simple Movements for Better Compositions
Once hovering feels comfortable, add slow movements to change perspective and add interest. Try these beginner-friendly techniques in short practise sessions:
-
Straight-line pans: Fly slowly forward or sideways while keeping the camera pointed at your subject. This works well for revealing more of a scene, like gliding over a lake to show reflections. Keep speed low in Cine mode to avoid blur.
-
Rising reveal shots: Start low with the camera tilted down, then ascend smoothly while tilting the gimbal up. It uncovers the landscape gradually, great for coastal paths or rolling hills common in the UK. Combine with backward flight for a classic pull-back effect.
-
Basic orbits: Circle a subject like a tree or building by combining yaw (rotation) with sideways movement. Start wide and slow—many drones have automated Point of Interest modes to handle this while you focus on the camera. Manual orbits build skill; keep the subject centred for balanced photos.
Handling Wind in UK Conditions
Wind is one of the biggest challenges here, with gusts common even on seemingly calm days, especially near coasts or open fields.
-
Most beginner drones handle steady winds up to 20–25 mph, but gusts drain batteries faster as the drone fights to stay stable.
-
Always fly into the wind on your outbound leg—this gives more power reserve when returning with the wind behind you. If the app shows high wind warnings, land early.
-
Check forecasts for ground and higher-level winds using apps like UAV Forecast. Postpone if gusts exceed your drone's rating—safety first, as sudden pushes can affect photo sharpness.
-
In breezy spots, increase distance from obstacles and people per CAA guidelines. Extra space gives reaction time if the drone drifts.
Practise these in 10–15 minute sessions, reviewing photos on your phone immediately to see what worked. Start low and close, build confidence gradually, and soon you'll capture unique aerial views that ground-level shots can't match. Keep flights fun and controlled—you'll improve quickly.
Camera Settings and Composition Basics
Your drone’s camera might be small, but it can produce impressive results if you use the right settings. Most beginner drones, like the DJI Mini series, offer both automatic and manual controls through the app. Auto mode is fine to start with—it handles exposure well in good light—but learning a few basics lets you fix problems on the spot and get more creative shots.
The live view on your phone or tablet screen is your main tool. Use it to check framing, exposure, and focus before pressing the shutter. Tap the screen to lock focus and exposure on a specific area if the drone is trying to balance bright sky and darker ground.
Understanding the Exposure Triangle
Good photos need the right amount of light, and three settings work together to control this: ISO, shutter speed, and aperture. Many compact drone cameras have a fixed aperture (often around f/2.8), so you’ll mainly adjust ISO and shutter speed.
-
ISO: This controls how sensitive the sensor is to light. Keep it as low as possible—usually 100 in bright daylight—to avoid noise (grainy speckles that reduce detail). Only raise it in low light, like dawn or dusk shoots over UK hills, but expect some quality loss above ISO 800.
-
Shutter speed: This is how long the sensor collects light. Fast speeds like 1/1000 or 1/2000 second freeze motion and prevent blur from drone movement or wind. Slower speeds (below 1/100 second) can create unwanted blur unless the drone is perfectly still in calm conditions. In bright UK summer light, fast shutters are common; on overcast days, the camera may slow down automatically.
-
Aperture: On most beginner drones, you can’t change this—it’s fixed. It affects depth of field (how much is in focus), but the small sensor means most scenes stay sharp front to back anyway.
Start in auto, then switch to manual (often called Pro mode in DJI apps) to tweak. Use the histogram in the app—a small graph showing light distribution—to avoid clipped highlights (overbright sky) or deep shadows.
Basic Composition Tips for Aerial Shots
Aerial photography gives perspectives you can’t get from the ground, so think about what makes the view unique. Patterns, shapes, and leading lines often stand out more from above. Use these simple guidelines to improve your framing:
-
Rule of thirds: Turn on the grid overlay in the app. Place key subjects—like a lone tree, building, or river bend—along the lines or at intersections rather than dead centre. This creates balance and draws the eye naturally through the image.
-
Include layers for depth: Add foreground interest, such as treetops or waves, a midground subject like a path or field, and background hills or sky. Flying lower helps separate these layers; too high and everything flattens out.
-
Look for patterns and symmetry: Rivers winding through valleys, crop circles, or coastal roads often reveal geometric shapes only visible from above. UK countryside and coastline are full of these—scout locations on Google Maps first.
-
Negative space: Don’t fill every part of the frame. Leaving empty areas, like calm water or clear sky, can make the main subject stand out more.
White Balance and Colour Accuracy
UK weather often means overcast or changeable light, which can make colours look dull or wrong if white balance is off.
-
Set white balance to match conditions: Choose “Sunny” for clear days, “Cloudy” for typical grey British skies, or “Auto” if light keeps shifting. Custom settings let you tap a neutral grey area for accuracy.
-
Check the live preview: Colours should look natural—greens vibrant in fields, blues true in water. Adjust on the spot rather than fixing later in editing.
-
Shoot in RAW format if your drone supports it (many mid-range models do). This keeps more colour data for tweaking later without quality loss.
Practical Tips While Flying
-
Take multiple shots of the same scene with slight adjustments—change height, angle, or settings. The app often shows overexposure warnings (zebra stripes or blinking highlights), so use them to dial back brightness.
-
Experiment safely in open areas. Review images full-screen on your phone right after landing to see what worked. Over time, these settings and composition ideas will feel natural, and your drone photos will stand out for their clarity and creativity.
Handling Common Challenges
Every beginner runs into issues at some point, whether it's a lost connection, tricky weather, or an unexpected bump. In 2026, drones from brands like DJI come with smarter safety features, such as better return-to-home logic and low-battery warnings, but knowing how to handle problems calmly keeps things under control. The goal is to spot issues early, react safely, and learn from them without panicking.
Most challenges stem from weather, signal problems, or simple oversights. Staying aware of your surroundings and the drone's status in the app helps prevent many of them.
Signal Loss or Interference
Losing connection between the controller and drone is frustrating but usually temporary. Modern drones often hover or activate return-to-home (RTH) automatically when signal drops.
-
Stay calm and keep visual line of sight: If the drone initiates RTH, let it complete unless it's heading into danger—then regain control once connected. Many DJI models pause and wait for reconnection or return safely. Avoid flying behind obstacles like trees or buildings that block signals.
-
Check for interference sources: Urban areas or places with lots of Wi-Fi, power lines, or mobile towers can disrupt the signal. Move to a clearer spot, restart the app and controller, or change channels if your drone allows. In the UK, crowded events or near airports can worsen this—always use apps like NATS Drone Assist to plan.
-
Pre-flight habits to reduce risk: Ensure strong GPS lock before takeoff (wait for 10+ satellites), update firmware regularly, and set RTH altitude high enough to clear obstacles (e.g., 50–60 metres in hilly areas). Weak GPS can compound signal issues, switching the drone to ATTI mode where it drifts more.
Battery Problems in UK Weather
Batteries are reliable but sensitive to cold, wind, and heavy use—common in British conditions. Cold slows the chemical reactions inside LiPo batteries, cutting flight time and risking sudden drops.
Practical ways to manage:
-
Warm batteries before flight: Keep them in an inside pocket or insulated bag until insertion—never fly with cold ones straight from the bag. In winter, this can add 10–20% more usable time. Hover briefly after takeoff to warm them further.
-
Plan for shorter flights: Expect 20–50% less runtime in cold or windy weather; land with 30% battery remaining as a buffer. Carry spares in a warm holder, and monitor voltage closely in the app—sudden sag means land immediately.
-
Avoid over-discharge: Fighting wind drains power fast, so fly into the wind outbound and with it on return. Don't push old or swollen batteries in cold—they're more prone to failure.
Dealing with Wind and Rain
UK weather changes quickly, and wind or drizzle can turn a good flight bad. Most beginner drones handle up to 20–25 mph gusts, but rain is a bigger risk.
-
Wind handling tips: Check apps like UAV Forecast for gusts at altitude. Fly conservatively—slow movements, lower heights—and give extra space from obstacles. If wind warnings appear, land early.
-
Rain avoidance: No consumer drone is fully waterproof; even light rain can seep into vents or motors, causing shorts or corrosion. Postpone if wet, or land fast if caught out—dry thoroughly afterwards, remove battery, and let air dry for 24–48 hours. Water damage often voids warranties.
-
Fog and visibility: Reduced sight means shorter, lower flights. Keep the drone close and use the app's radar if available.
Wildlife Encounters and Minor Crashes
Birds sometimes see drones as threats, especially raptors or gulls in coastal or rural UK spots. Minor crashes from branches or misjudged landings happen to everyone.
-
Bird interactions: Fly higher or away from nests/seabirds—many species dive at drones. If approached, descend slowly and move away; avoid aggressive moves that provoke attacks.
-
Crash recovery: Inspect for damage immediately—check propellers for cracks (replace if any), arms for bends, and clean sensors. Log what happened (e.g., wind gust or overcorrection) to improve next time. Spare props are cheap insurance.
-
General post-flight checks: Wipe down the drone, especially after damp outings, and review flight logs in the app for insights.
Tackling these early on builds confidence. Start in easy conditions, practise often, and soon challenges feel manageable. If something serious happens, contact the manufacturer—many offer good support. Safe flying means enjoying the hobby longer.
Post-Processing Your Photos
Once you’ve landed and transferred your photos to a computer or phone, a bit of editing can turn good aerial shots into great ones. Post-processing lets you fix small issues from flight conditions—like uneven exposure from changing UK light—and enhance the natural beauty of landscapes or architecture. You don’t need expensive software to start; free tools are powerful enough for beginners and give professional-looking results with just a few adjustments.
Most drone cameras shoot in JPEG by default, which is fine for quick edits, but if your model offers RAW (DNG format on many DJI drones), use it. RAW files hold more detail, especially in shadows and highlights, giving you far more flexibility when correcting overcast skies or bright reflections.
Choosing Your Editing Tools
You have plenty of free or low-cost options that work well on phones, tablets, or computers.
-
Mobile apps: DJI Fly app has basic built-in editing, but try Snapseed (free from Google) or Lightroom Mobile (free version covers most needs). They’re touch-friendly and great for quick tweaks on the go.
-
Desktop software: GIMP is completely free and very capable—think of it as a no-cost Photoshop alternative. Adobe Lightroom Classic or Photoshop Elements are paid but often on trial or subscription. For RAW processing, Darktable is another strong free option.
-
Built-in phone editors: The Photos app on iPhone or Google Photos on Android handle cropping, exposure, and colour surprisingly well for casual edits.
Start with one tool and learn it properly rather than jumping between several.
Essential Basic Adjustments
Work in this order for most photos—it’s a simple workflow that fixes the common issues in drone shots. First, make a copy of your original file so you can always go back. Then tackle these steps:
-
Crop and straighten: Drone horizons often tilt slightly from wind or uneven hovering. Use the straighten tool to level the horizon by dragging along it, then crop to improve composition—remove empty sky or foreground that doesn’t add to the shot. Tightening the frame focuses attention on the main subject.
-
Exposure and brightness: UK weather frequently gives flat light or harsh shadows. Increase exposure or brightness gradually if the image looks dark overall. Pull back highlights if bright sky is blown out, and lift shadows to reveal detail in darker areas like woodland. Use the histogram (a graph in most editors) to ensure details aren’t lost at either end.
-
Contrast and clarity: Add a touch of contrast to make landscapes pop—darker shadows and brighter highlights create depth. Clarity (or structure in some apps) sharpens mid-tone edges, bringing out texture in fields, stone walls, or coastal rocks without looking over-sharpened.
Colour Correction for Natural Results
Aerial photos often need subtle colour tweaks to match what you saw with your eyes, especially under cloudy British skies.
-
Boost vibrance rather than saturation: Vibrance intelligently lifts dull colours without overcooking skin tones or skies. A small increase makes greens in countryside shots richer and blues in water deeper.
-
Adjust white balance if needed: Overcast days can give a cool blue cast—warm it slightly for more natural tones. If you shot in RAW, you can fine-tune this easily; JPEG has less room to move.
-
Use curves or levels for precise control: Pull the curve into a gentle S-shape to add contrast without crushing details. This is more controlled than sliding a single contrast slider.
Noise Reduction and Sharpening
Higher ISO shots from low light or dusk flights introduce grainy noise, and drone cameras can sometimes produce softer images.
-
Apply noise reduction selectively—reduce luminance noise (grain) first, then a little colour noise if needed. Overdoing it makes images look plastic, so compare before and after at 100% zoom.
-
Sharpen lightly at the end of your workflow. Most tools have an “unsharp mask” or similar—use a modest amount to bring out fine details in buildings or tree lines. Export a test version to check it doesn’t look artificial on different screens.
Exporting and Saving Your Work
-
Save your edited master file in a high-quality format like TIFF or PSD if you plan more changes later. For sharing online or with friends, export as JPEG at 80–90% quality—files stay manageable while keeping sharpness.
-
Add a simple file-naming system, like date_location_edit, so you can find originals and edited versions easily. Over time, reviewing your edits helps you spot patterns—like consistently underexposed shots—and improve your in-flight settings.
Editing is a skill that improves quickly with practice. Spend 10–15 minutes on each session’s best photos, and you’ll soon see dramatic improvements. Most importantly, keep changes subtle—your drone captured a real view from above, and gentle edits let that natural beauty shine through.
Advanced Tips as You Progress
As you become more comfortable flying and capturing solid photos, you can start experimenting with techniques that add creativity and polish to your work. These build directly on the basics you’ve already learned, like steady hovering and manual camera settings. In 2026, most mid-range and pro-level drones offer built-in tools that make advanced shots easier, but even entry-level models can achieve impressive results with a little planning.
The key is to practise in familiar, safe locations first. Push your skills gradually—try one new technique per outing rather than everything at once.
Creating Time-Lapses
Time-lapses compress hours into seconds, perfect for showing changing light over UK landscapes, cloud movement, or busy scenes like tides coming in. Many DJI drones have a dedicated time-lapse or hyperlapse mode in the app, handling intervals and movement automatically.
-
Set up a stable hover using GPS hold, ideally on a calm day to minimise drift. Choose intervals of 2–10 seconds depending on the subject—shorter for fast-moving clouds, longer for slow sunsets. Aim for 200–300 photos to create a 10–15 second clip at 30 fps later.
-
Lock exposure manually before starting so each frame matches—auto can cause flickering as light changes. Point the gimbal slightly down to include foreground interest, and use waypoint hyperlapse modes on newer models for smooth movement along a path.
-
After the flight, transfer images to free software like DaVinci Resolve or Adobe Premiere Rush (both have free versions) to compile the sequence. Add gentle colour grading for mood, and export as video for easy sharing.
Shooting and Stitching Panoramas
Panoramas capture sweeping views that a single drone frame can’t, ideal for wide coastal scenes, valleys, or city skylines. Most drone apps now include an automated panorama mode that controls the sequence and stitches in-camera.
-
For manual control (which often gives better results), hover steadily and take a series of overlapping photos—around 30–50% overlap—while slowly yawing or moving sideways. Keep altitude and exposure consistent; use AEB (auto exposure bracketing) if light varies across the scene.
-
Shoot in portrait orientation for taller panoramas or landscape for wider ones. Include plenty of overlap at the edges to help stitching software align everything accurately.
-
Back home, use free tools like Microsoft ICE (Image Composite Editor) or Hugin to merge the images. Lightroom and Photoshop also handle this well. The result is a high-resolution file perfect for large prints or detailed online viewing.
Using ND Filters for Creative Effects
Neutral Density (ND) filters act like sunglasses for your drone camera, cutting light so you can use slower shutter speeds even in bright conditions. Clip-on sets from brands like Freewell or PolarPro are lightweight and designed specifically for popular models like the DJI Mini and Air series.
-
Start with an ND8 or ND16 for typical sunny UK days—these allow shutter speeds around 1/50–1/100 second, creating slight motion blur in water or clouds for a dreamy look. Stronger ND32 or ND64 work for very bright coastal scenes or snowy landscapes.
-
Combine slow shutters with smooth gimbal movement for cinematic video, or static long exposures for silky rivers and seas. Always balance the propellers after adding filters—extra weight can affect flight slightly.
-
Test different strengths in the same location to see the effect. Remove the filter for normal stills; swapping takes seconds with magnetic versions now common.
Tracking Subjects and Active Composition
Once basic orbits feel natural, try subject tracking—many drones can now lock onto and follow people, cars, or animals intelligently.
-
Use this sparingly for photography to create dynamic reveals or parallel tracking shots along paths. Combine with manual gimbal control for more artistic results than fully automated modes.
-
Look for leading lines from above—rivers, hedges, or roads—that guide the eye through the frame. Experiment with unusual angles, like very low over water (safely) or straight down for abstract patterns in fields or car parks.
-
Review your shots regularly and note what excites you most. Over time, these advanced techniques will become second nature, helping you produce distinctive aerial images that stand out. The UK offers endless varied scenery—keep exploring new locations, stay within regulations, and enjoy seeing your skills grow.
Staying Safe and Healthy While Flying
Flying a drone often means spending hours outdoors in all sorts of UK weather, sometimes in quiet rural spots or exposed coastal areas. Looking after your own safety and wellbeing is just as important as following CAA rules or protecting the drone. A few straightforward habits help you avoid common problems like dehydration, trips, or getting caught out by sudden changes in conditions.
Personal preparation keeps the focus on enjoying the flight and photography rather than dealing with discomfort or emergencies.
Dressing and Preparing for UK Weather
British weather can turn quickly, so layers and sensible clothing make a real difference.
-
Always check the forecast before heading out, but pack for rain, wind, or cooler temperatures even if it looks fine. Waterproof jackets, sturdy boots, and quick-dry layers handle drizzle or mud common in fields and paths. In winter, thermal base layers and gloves (thin enough to use the controller) prevent cold hands from affecting control.
-
Carry essentials in a small backpack: Plenty of water, snacks, a charged phone with offline maps, and a basic first-aid kit including plasters and any personal medication. If you’re flying alone in remote areas, add a portable charger—your phone is your link to help if needed.
-
Consider your health needs: If you have any medical conditions, carry identification or a medical alert card with key details and emergency contacts. Simple, durable options are available that fit easily in a wallet or attach to your bag.
Protecting Yourself from the Sun and Glare
Even on overcast days, UV levels can be high, especially when you’re standing in open spaces for long periods. Glare from the phone or controller screen is a frequent issue that strains eyes and makes it harder to see the live view.
-
Apply broad-spectrum sunscreen (SPF 30 or higher) to face, neck, and hands, and reapply every couple of hours. Wear a wide-brimmed hat and UV-protective sunglasses—these reduce squinting and help you spot the drone against bright skies.
-
Position yourself thoughtfully: Stand in the shade of a tree or vehicle when possible, or use a controller sun hood (inexpensive clip-on shades are widely available). Polarised sunglasses cut screen glare effectively without darkening the view too much.
-
Take regular breaks: Step away from the screen every 20–30 minutes to rest your eyes and stretch. Long sessions looking down at the app can cause neck strain—hold the controller at a comfortable height.
Staying Aware on Uneven or Slippery Ground
When your eyes are on the screen or sky, it’s easy to miss hazards underfoot, especially in typical UK flying spots like grassy fields, cliff paths, or muddy tracks.
-
Scout the area first: Walk the takeoff/landing zone and your standing position before launching. Note any rabbit holes, rocks, wet patches, or steep drops nearby. In hilly or coastal areas, be extra mindful of slippery grass after rain.
-
Adopt a stable stance: Stand with feet shoulder-width apart, knees slightly bent, on firm ground. Avoid moving around while concentrating on fine controls—plant yourself securely.
-
Fly with a companion when possible: A spotter watches the drone and surroundings while you control it, alerting you to people, dogs, or terrain issues.
Basic Emergency Preparedness
Problems are rare, but being ready means they stay minor.
-
Let someone know your plans—where you’re going and when you expect to be back—especially for solo trips to remote locations.
-
Keep emergency numbers handy: 999 or 112 for life-threatening situations, 101 for non-emergency police if needed (e.g., reporting a lost drone that might cause concern). Save them in your phone and note local signal strength—some rural spots have poor coverage.
-
Drone retrieval plan: If the drone lands far away or in difficult terrain like trees or water, carry a lightweight throw line or consider waiting rather than risking injury. Mark the GPS location in the app immediately.
-
Insurance check: Many home contents policies cover drones, and specialist drone insurance often includes personal accident cover—worth reviewing for peace of mind.
By building these habits early, you make drone flying a sustainable and enjoyable part of your routine. Staying alert, comfortable, and prepared means more time capturing great photos and fewer worries about the unexpected. Look after yourself out there—the views are worth it.
Looking Ahead in 2026
Drone technology moves quickly, and 2026 is already bringing noticeable improvements that make aerial photography even more accessible and enjoyable for beginners. While the basics you’ve learned in this guide remain the foundation of great flying and shooting, keeping an eye on new developments helps you grow at your own pace. The good news is that you don’t need the latest gadget to take stunning photos—mastering control, composition, and safety will always matter most.
Here’s a realistic look at what’s coming in 2026 and how it fits into your journey as a new drone pilot.
Key Trends Shaping Drone Photography This Year
Manufacturers are focusing on smarter, safer, and more user-friendly features rather than just bigger cameras.
-
Smarter AI assistance: Many drones now include advanced auto-framing tools that suggest compositions in real time or automatically adjust the gimbal to follow the rule of thirds. Some models can even detect interesting subjects—like a winding river or a lone tree—and recommend the best angle. These features act like a helpful co-pilot, but they work best once you already understand manual framing.
-
Longer flight times and ranges: Battery technology has improved, pushing average flight times to 35–45 minutes on mid-range models. Transmission distances are stretching further too, often reliably up to 10–12 km in clear conditions. This means more time to explore larger UK landscapes, from Scottish highlands to Cornish coastlines, without constant battery swaps.
-
Better low-light performance: Sensors are getting larger and more sensitive, producing cleaner images at dawn, dusk, or under cloudy skies—common in Britain. Night flying modes with brighter LEDs and improved stabilisation are also becoming standard on newer releases.
-
Enhanced safety features: Automatic obstacle avoidance is now more reliable in all directions, and geofencing is smarter, warning you earlier about restricted zones. Some drones even suggest safer routes based on real-time weather and airspace data.
How to Stay Informed Without Feeling Overwhelmed
You don’t need to follow every announcement—focus on reliable sources that matter for UK pilots.
-
Subscribe to the CAA’s Drone newsletter or check their website regularly for rule updates and safety tips.
-
Follow UK drone communities on platforms like Facebook, Reddit, and Instagram for real-user reviews of new models as they arrive.
-
Use apps like Drone Assist, UAV Forecast, and the DJI Fly app—they often highlight firmware updates and new features as soon as they roll out.
Advice for Beginners in a Fast-Moving Year
New tech is exciting, but chasing the latest model can distract from building real skill.
-
Stick with the drone you already have and focus on improving one thing at a time: smoother flights, better compositions, confident editing. Once those feel solid, any upgrades will feel like natural steps forward rather than a complete restart.
-
When you’re ready to upgrade, look for models that solve specific frustrations you’ve noticed—longer battery life if you run out too soon, or better wind resistance if gusts are your biggest challenge. Read recent reviews from UK users to see how new drones perform in our typical weather.
Final Thoughts
This guide has covered everything you need to start flying safely, legally, and creatively in 2026. You’ve learned how to choose a drone, understand the rules, prepare for flights, handle the camera, overcome common issues, edit your photos, try advanced techniques, stay safe and healthy, and connect with others.
The most important part comes next: getting outside, launching your drone, and capturing the views only you can see from above. The UK has incredible variety—rolling hills, dramatic coastlines, historic sites, quiet villages—and drones let you experience it in a completely new way.
Mistakes will happen, photos won’t always turn out perfectly, and that’s normal. Every flight teaches you something. If questions come up or you want to share your progress, the community is there waiting.
So charge the batteries, check the weather, and go fly. The sky is waiting—and so are the photos only you can take. Happy flying!
© 2024 The Card Project Uk Ltd
VAT: 453 2087 06
|